
The Step-by-Step Guide on How to Shoot Reflective Products: Mastering Product Photography
Are you ready to elevate your product photography skills and capture the brilliance of reflective products? In this comprehensive guide, we’ll delve into the intricacies of shooting reflective surfaces, providing you with a roadmap to master this challenging yet rewarding aspect of product photography.
Understanding Reflective Surfaces
Reflective surfaces present a unique challenge for photographers due to their propensity to bounce light in various directions, leading to unwanted glare and reflections.
Overcoming Challenges: Techniques for Shooting Reflective Products
Shooting reflective products requires a nuanced approach and specialized techniques to minimize glare and capture the true essence of the product.
Finding the Right Lighting Setup
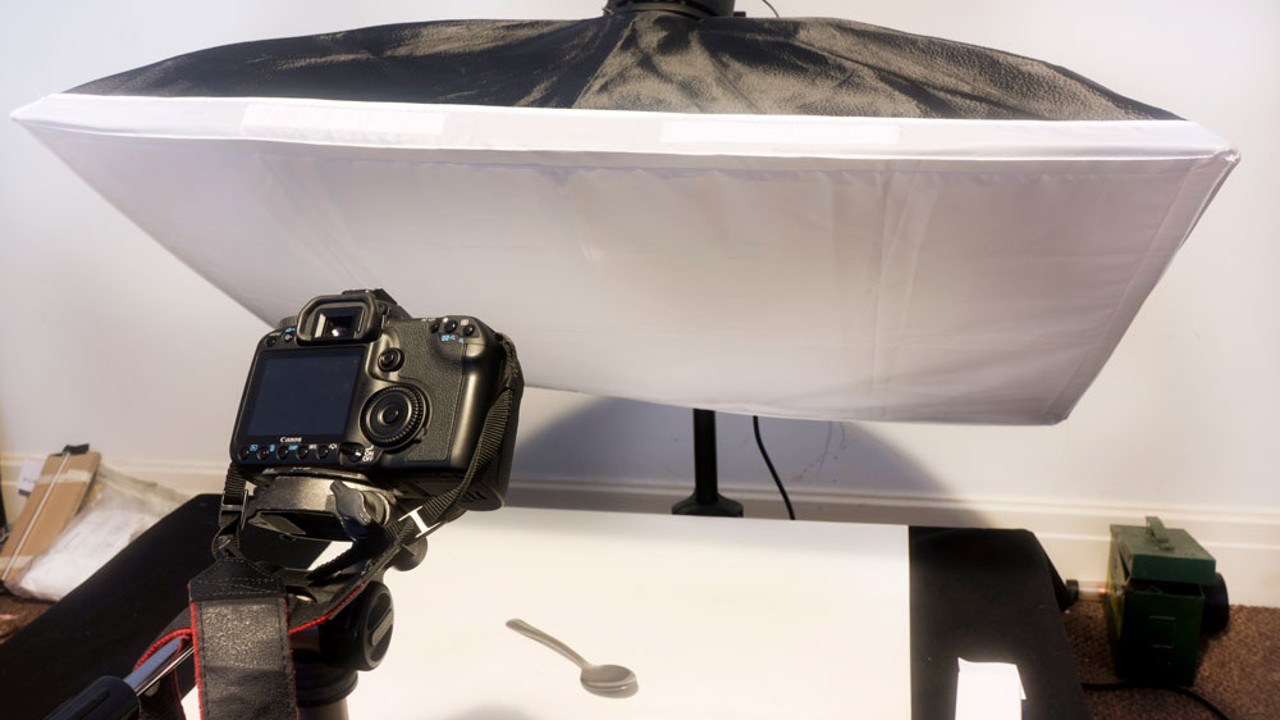
Achieving optimal lighting is paramount when shooting reflective products. Experiment with different lighting angles and sources to find the perfect balance that highlights the product while minimizing glare.
Utilizing Diffusers and Reflectors
Diffusers and reflectors are invaluable tools for controlling and manipulating light when shooting reflective surfaces. Place diffusers strategically to soften harsh light, while reflectors can help redirect light to fill in shadows and enhance highlights.

The Step-by-Step Guide on How to Shoot Reflective Products
Mastering the art of shooting reflective products requires a systematic approach and attention to detail. Follow these step-by-step instructions to capture stunning images that showcase the beauty of reflective surfaces.
Step 1: Preparing Your Workspace
Before diving into the shoot, ensure your workspace is clean and clutter-free. Remove any distracting elements that may detract from the product’s reflection.
Step 2: Choosing the Right Background
Selecting the appropriate background is crucial when shooting reflective products. Opt for solid colors or neutral tones to minimize distractions and allow the product to take center stage.
Step 3: Setting Up Your Camera
Take the time to set up your camera properly, adjusting settings such as aperture, shutter speed, and ISO to achieve the desired exposure. Consider using a tripod to ensure stability and reduce the risk of camera shake.
Step 4: Positioning the Product
Carefully position the reflective product within the frame, paying attention to composition and angles. Experiment with different perspectives to capture unique reflections and textures.
Step 5: Focusing and Framing
Use manual focus to ensure pinpoint accuracy when capturing reflective surfaces. Pay close attention to the product’s details and adjust framing as needed to highlight its best features.
Step 6: Adjusting Lighting and Exposure
Fine-tune your lighting setup and exposure settings to achieve optimal results. Keep a close eye on reflections and glare, making adjustments as necessary to minimize distractions.
 FAQs (Frequently Asked Questions)
- How can I reduce glare when shooting reflective products?
To reduce glare, experiment with different lighting angles and utilize diffusers to soften harsh light. Additionally, positioning the product at a slight angle can help minimize reflections.
- What type of lighting is best for shooting reflective products?
Soft, diffused lighting works best for shooting reflective products as it helps minimize glare and produce even illumination across the surface.
- Do I need specialized equipment for shooting reflective products?
While specialized equipment such as diffusers and reflectors can be beneficial, it’s possible to achieve great results with basic photography tools. Experimentation and creativity are key.
- How can I enhance the reflections in my photos?
To enhance reflections, consider using reflective surfaces or props strategically placed around the product. Additionally, adjusting the angle of incidence can help maximize reflections.
- What editing techniques can I use to improve reflective product photos?
In post-processing, focus on reducing glare and enhancing contrast to make the product stand out. Utilize tools like dodge and burn to fine-tune highlights and shadows.
- How do I maintain consistency in my reflective product photography?
Consistency is key to producing professional-looking product images. Establish a standardized workflow and lighting setup to ensure uniformity across all your photos.
Conclusion
Mastering the art of shooting reflective products requires patience, experimentation, and attention to detail. By following the step-by-step guide and implementing essential techniques, you’ll be well-equipped to capture stunning images that showcase the beauty and intricacy of reflective surfaces.