
Portrait Retouch For Beginers – 5 Easy Step To Make Your Portrait Lucrative
Photoshop Portrait Retouching – Step By Step Guide For Beginners
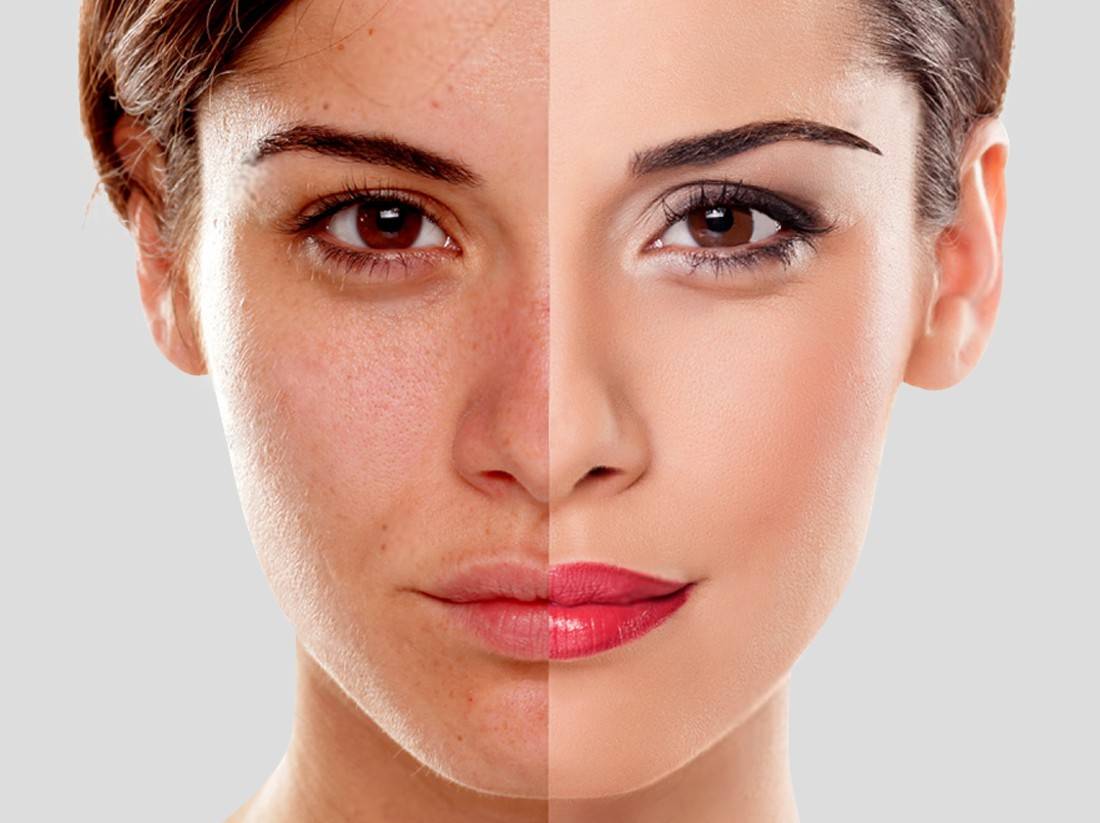
If you’re a photographer, you know that good portrait photography requires a lot of detail and precision. To achieve this level of quality, you need to be able to retouch portraits in Photoshop. We will teach you the basics of retouching portrait in Photoshop. We’ll cover everything from how to correct skin tone to enhancing features and more. So whether you’re a beginner or an experienced Photoshop user.
Portrait Retouching
If you’re looking for a quick and easy way to improve the appearance of your portraits, you’ll want to give portrait retouching a try. With a little photoshop magic, you can add years onto your face, remove blemishes, and even create false eyelashes or eyebrows. We’ll show you how to do all of these things using some basic Photoshop actions.

First, open up your photo in Photoshop and use the eyedropper tool to select the area you want to alter. We’ll be removing some skin from around the eyes and mouth, so make sure those areas are well-defined. Next, choose the Clone Tool (C) and use it to copy the area you just selected onto a new layer. Now go ahead and erase any unwanted areas with the Eraser Tool (E).
Next, we’re going to reduce the width of our nose by using the Gradient Tool (G) with a black-to-white gradient. To do this, start by clicking on the black point on the gradient bar and dragging it toward the white point. You’ll probably need to adjust the opacity accordingly so that it’s not too intense. Once you’ve done that, press Return/Enter (Q) to finish editing the gradient.
Now we’re going to add some volume to our lips with a simple fill action called “Satin Lipgloss.” To create this action, simply click on the “New Action”
4 Steps to Get Better Portraits!
Making use of tools like Photoshop and Lightroom can help create a final product that is not only stunning but also digital. However, using these tools can be time-consuming and difficult for those who are not professional photographers. Top 4 steps that you might find helpful when editing your photographs!

Step 1: RAW Conversion
To start with, open your RAW file in Adobe Camera Raw. From here, you need to make some basic adjustments to the image.
First, you will need to adjust the exposure and brightness. To do this, use the Exposure slider in the Basic tab of the Camera Raw interface. By default, this slider is set to 0 (zero), which means that it is set to the camera’s automatic exposure setting. You can increase or decrease the exposure by moving the slider up or down.

Next, you will need to make some adjustments to the color balance. To do this, use the Color Balance slider in the Basic tab of the Camera Raw interface. This slider can be used to adjust the colors of your photo. To change the color balance, move the slider towards either the red or blue end of the spectrum. You can also change the hue by selecting a different color from the drop-down menu below the slider.
Finally, you will need to make some adjustments to sharpness and noise reduction. To do this, use the Sharpening and Noise Reduction sliders in the Basic tab of the Camera Raw interface. By default, these sliders are both set to 0 (zero), which means they are set to the camera’s default settings. You can increase or decrease the sharpness and noise reduction by moving the sliders up or down.
Step 2: Image Cleanup
Remove any objects that are not part of the image. This includes stray lines, blemishes, and other artifacts. To improve clarity, try to remove any background noise or elements that are not essential. Finally, adjust color and contrast to make the image more legible.

- Sharpen
- If the image is blurry, you can try to sharpen it using one of the available tools. This will improve the clarity of the image.
- Exposure
- If the image is too bright or dark, you can adjust the exposure to make it more balanced Levels
- If the image is too contrasty, you can adjust the levels to make it more balanced.
- Border and Edge Enhancement
- Use a border and edge enhancement tool to add a frame around the image, and enhance the edges to make them more visible. This will improve the appearance of the image and make it look sharper.
- Texturing and Lighting
- Add texturing and lighting to give the image a more polished look. This can be done by adding highlights, shadows, or blurs to specific areas. You can also use color saturation to create a more dramatic effect.
Step 3: Dodge and Burn
- The dodge-and-burn technique is a simple yet effective tactic used in warfare. It consists of dashing forward to avoid enemy fire, then turning and running in the opposite direction. This tactic can be incredibly useful when used in conjunction with other tactics, such as flanking or trapping.

- By using dodge and burn, you can quickly move out of the way of enemy fire and strike back at them from a new angle. This tactic can be very effective when used in conjunction with other tactics, such as flanking or trapping. Dodge and burn is a simple yet effective tactic that can be incredibly useful in warfare.

Step 4: Color Grading
- Once you have exported your file, it is ready for color grading. Color grading is the process of adjusting colors in a video or image to make them look better. There are a number of tools that can be used for color grading, including photo editing programs like Photoshop and GIMP, video editors like Adobe Premiere or Final Cut Pro, and even online services like Color Grading Central.
- To color grade, a photo, start by importing the file into your photo editor. You will then need to adjust the colors of the footage to make it look better. For example, you may want to adjust the colors of the sky to make it bluer, the colors of the ground to make them more green, or the colors of the clothing to make them look more realistic. You can also use color grading tools to adjust the overall brightness and darkness of a scene, as well as the contrast between different colors.
- Once you have finished color grading your footage, you can export it using different file formats, such as AVI or MP4, depending on what type of video editing software you are using.

Photoshop Portrait Retouching Service
Adding a bit of retouching to portraits can help them look more polished and professional. Photoshop portrait retouching tutorial, we’ll show you how to use some basic tools and actions to improve the look of your subjects’ skin, eyes, and hair.
First, let’s start by correcting any unwanted redness or blemishes on the skin. To do this, we’ll use the Burn tool (B) to lighten areas that are too dark and the dodge tool (D) to lighten areas that are too light. Try not to overdo it—just a slight adjustment will make a big difference.
Next, let’s add some life to the eyes by adjusting their color and brightness. To do this, we’ll use the eye dropper tool (I) to sample colors from around the eye and then use the Levels command (L) to adjust their opacity. Be sure to brush around the entire eye with gentle strokes so that you don’t end up with any harsh edges.
Finally, we’ll give our subjects’ hair some style and volume using the Transform tool (T). To start, click on one of the strands of hair and then use the Rotate tool (R) to adjust its angle. Once you’ve got it looking how you want it, use the Scale tool (S)to increase or decrease its size.
Portrait Retouching Service With Fair and Reasonable Prices
Are you looking for a portrait retouching service that can help make your portraits look their best? then Cloud Retouch is the best option for you. Cloud Retouch is a portrait retouching service that can help you achieve the look you are looking for in your portraits.

Cloud Retouch, you can be sure that your portraits will be of the highest quality retouching service. Cloud Retouch has 10 years of experience retouching portraits, and they are experts at making your portraits look their best. With Cloud Retouch, you can be sure that your portraits will be accurate and polished.
High-End Portrait Retouching Using Photoshop
This Photoshop portrait retouching tutorial will show you how to remove blemishes, fix skin tones, and correct wrinkles. We’ll also be using some high-end actions to achieve a more polished look.

- Begin by opening your photo in Photoshop.
- Select the areas that you want to retouch, using either the lasso tool or the brush tool. Make sure to use a small brush size so that you don’t over-retouch the area.
- Use the healing brush tool to fix any blemishes on the skin. You can also use the clone stamp tool to copy and paste a section of skin that is smoother and less wrinkled.
- Use the adjustment layer styles to adjust the skin tones and wrinkles. You can also use the highlights and shadows adjustment layers to add more depth to the photo.
- Finally, use some high-end actions to give your photo a more polished look. We recommend using the blur filter and the noise reduction effect to create a softer focus and then adding a drop shadow effect for added depth and realism.
Raw Portrait Photos for Retouching Using Photoshop
If you’re looking to take your portraits up a notch, consider enlisting the help of Photoshop. With a little retouching, you can transform your ordinary shots into something much more striking and memorable. This Photoshop portrait retouching tutorial will show you how to do just that.

First, start by opening your photo in Photoshop. Next, select all of the hair on either side of the person’s head and use the layer mask tool to hide everything except for the hair on one side. Use the Burn tool (B) to darken the area around the hairline on that side, then use Dodge (O) and Burn again to lighten it up a bit. Finally, use Hue/Saturation (I) to adjust the color of the hidden areas until they match your desired hue and saturation.
Next, remove any blemishes or imperfections from the skin using the Eraser tool (E). Start by gently brushing over any areas that need removal, then gradually increase the pressure as needed until you achieve results that are satisfactory. Be sure to pay close attention to any areas that might be difficult or impossible to erase cleanly – those spots will likely require additional editing later on in order to get them perfect.
Finally, add some lightening and darkness effects across various parts of the face using adjustment layers such as Levels (L) and Contrast (C). Use these tools sparingly though – over-editing can quickly turn a good-looking portrait
High-End Portrait Retouching Tutorial
If you are a photo enthusiast or professional looking for ways to improve your portraits, then this Photoshop portrait retouching tutorial is for you! We will be covering the basics of high-end portrait retouching using various tools and actions.
High-End Skin Softening in 1 Minute or Less in Photoshop
High-End Skin Retouching & Sculpting in Photoshop
To start, we will need to gather some images of people that we would like to retouch. If you have any photos of family or friends that you would like to improve, then this is the tutorial for you! We will be using some basic tools in Photoshop such as the brush tool, healing brush, and clone stamp. However, if you are looking to do more advanced portrait work such as removing blemishes or adding features such as wrinkles or age spots, then we suggest purchasing one of the many Photoshop portrait editing plugins available on the market.
Once we have our images ready, it’s time to start editing! We can begin by adjusting the brightness and contrast of our images using the adjustment layers panel. Next, we’ll use the dodge and burn tools to add subtle highlights and shadows to our portraits. Finally, we’ll use the filter effects panel to add a vintage look or adjust looks such as skin texture and eye color. By following these simple steps, we can easily improve the overall appearance of our portraits!
Portrait Retouching Services at Cloud Retouch
Digital Portrait Photo retouching and editing can make your photos look great and can make a great difference in your look. It can make you more attractive, and more graceful, and it will enhance your facial features so that the world takes notice of you.
There are basically three things that need editing in Portrait photos: whitening teeth, removing hair from the face and eyes, and reducing pores. To get these services, you have to hire a professional retoucher who is an expert at his work, like Cloud Retouching Services provider, who provide the best portrait or Portraits photo retouch service at affordable prices across the globe with quick turnaround time. You can hire Cloud Retouching Services to retouch your photos for different types of Portrait photography. If you are looking to get it done for a fashion shoot, then they will do their best.
Portrait Retouch Frequently Asked Questions (Faq)
How to Retouch Portraits?
Retouching portraits is a process of adjusting the brightness, contrast, and colors of images to make them look their best. Basic portrait-related skills are necessary, as are some image editing techniques.
How to Retouch Portrait Online?
There are many ways to retouch portraits in Photoshop, but the most important thing to remember is that you need to be precise with your steps. Three methods include using the adjustments filters, cloning, and using the fill & soft edge brush tool.
How to Retouch Portrait Photography?
1. Remove blemishes and imperfections using the healing brush and Patch tool.2. Adjust brightness, contrast, and color using the adjustment layers tool.3. Clean up edges with the eraser tool and masks.4. Edit background using photo editors such as GIMP or Photoshop Elements.
How to Retouch Portraits in Photoshop?
To create realistic portraits in Photoshop, start by setting your document size and resolution, using a black background if possible, and using selective editing techniques to adjust brightness, contrast and color levels. Final effects can be added with highlights and shadows.
How to Retouch Portraits in Lightroom?
To improve the look of your portrait photography in Lightroom, you should first clean up any distracting backgrounds and props, adjust lighting and shadows, and fix basic image problems.
Does Portrait Mode Retouch Skin?
In Photoshop, you can use portrait mode to retouch skin, or you can use different tools to achieve the same results. Layers and dodge and burn are both good methods for retouching skin.[/vc_column_text][/vc_column][/vc_row]