In the competitive landscape of e-commerce, captivating product images play a pivotal role in attracting potential customers. Ghost mannequin photography, also known as invisible mannequin or hollow man photography, has emerged as a powerful technique for showcasing apparel and garments in a lifelike manner. By seamlessly blending different shots, this method creates a ghostly effect, allowing the clothing to appear as if it’s being worn by an invisible model.
Importance of Ghost Mannequin Photography for E-commerce
In the realm of online shopping, where customers cannot physically touch or try on the products, high-quality visuals serve as the primary point of reference. Ghost mannequin photography offers several advantages for e-commerce businesses:
- Enhanced Product Presentation: By eliminating distractions and focusing solely on the garment, ghost mannequin photography provides a clear view of the product’s design, fit, and features.
- Improved Customer Experience: Realistic product images instill confidence in potential buyers, reducing the likelihood of returns or dissatisfaction with the purchase.
- Brand Consistency: Adopting a standardized approach to product photography ensures uniformity across the website, reinforcing brand identity and credibility.
- Increased Conversion Rates: Compelling visuals have a direct impact on conversion rates, enticing visitors to explore the product further and make a purchase.
Choosing the Right Mannequin
Before diving into the photography process, it’s crucial to select the appropriate mannequin for the job. Factors to consider include:
Types of Mannequins
- Traditional Mannequins: These full-body mannequins are ideal for showcasing a wide range of apparel, including dresses, suits, and outerwear.
- Torso Mannequins: For focusing solely on tops or bottoms, torso mannequins provide a cost-effective solution without the bulk of a full-body model.
- Specialized Mannequins: Some mannequins are designed for specific purposes, such as lingerie or athletic wear, catering to niche markets.
Size and Fit
Ensure that the dimensions of the mannequin correspond to the typical body size of your target audience. A well-fitted mannequin ensures that the garments appear flattering and accurately represent how they would look on a human body.
Preparing the Garments
Before dressing the mannequin, take the time to prepare the garments for photography. Wrinkles, creases, and imperfections can detract from the overall appeal of the product. Follow these steps to ensure a polished presentation:
Ironing and Steaming
Smooth out any wrinkles or folds by ironing the garments or using a garment steamer. Pay close attention to details such as cuffs, collars, and seams to achieve a pristine look.
Correct Positioning
Dress the mannequin carefully, ensuring that each piece of clothing fits snugly and hangs naturally. Adjust the fabric to eliminate any bulges or distortions, maintaining a clean and symmetrical appearance.
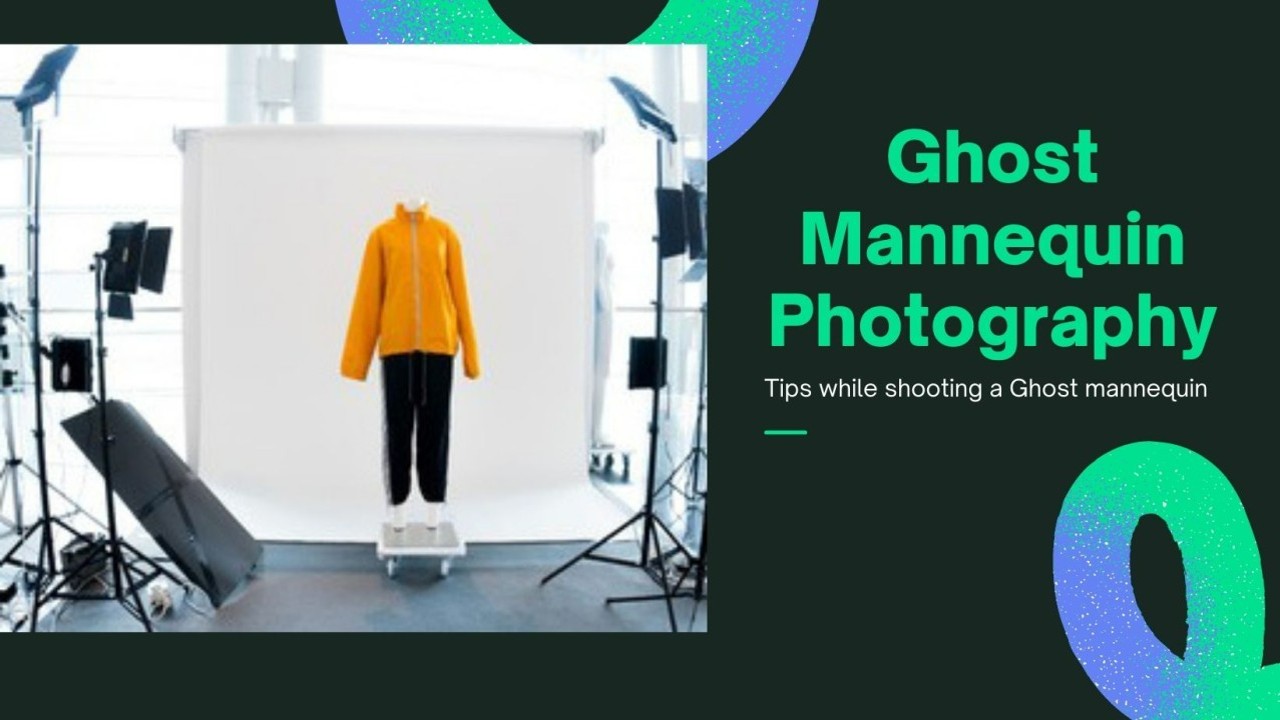
Setting Up the Studio Environment
The success of ghost mannequin photography hinges on creating the right atmosphere and ambiance in the studio. Consider the following factors:
Lighting Considerations
Proper lighting is essential for capturing the details and textures of the garments accurately. Opt for soft, diffused lighting to minimize harsh shadows and highlight the nuances of the fabric.
Backgrounds and Props
Choose a neutral background that complements the colors and style of the clothing without overpowering the main subject. Simple props or accessories can enhance the visual appeal of the image without distracting from the product itself.
Camera Equipment and Settings
Selecting the appropriate camera gear and settings is crucial for achieving professional-quality results in ghost mannequin photography:
Camera Selection
While high-end DSLR cameras offer superior image quality and versatility, modern smartphones with advanced camera features can also yield impressive results. Choose a camera that suits your budget and technical requirements.
Aperture, Shutter Speed, and ISO
Adjust the camera settings to achieve the desired depth of field, shutter speed, and sensitivity to light. Experiment with different configurations to find the optimal balance between sharpness and exposure.
Mannequin Placement and Angles
Capturing the garment from multiple angles is essential for providing a comprehensive view to potential buyers:
Front, Back, and Side Views
Take photographs of the garment from the front, back, and sides to showcase its design and features from every angle. Pay attention to details such as buttons, zippers, and stitching to convey the quality of craftsmanship.
Capturing Details
Zoom in on specific areas of interest, such as intricate patterns or embellishments, to highlight the unique selling points of the product. Close-up shots add depth and dimension to the images, enticing viewers to inspect the garment more closely.
Editing and Retouching Techniques
Post-processing plays a crucial role in refining the final images and ensuring consistency across the product catalog:
Removing Mannequin
Use image editing software such as Adobe Photoshop to seamlessly remove the mannequin from the photographs, leaving behind a ghostly silhouette. Pay attention to blending and masking techniques to achieve a natural-looking result.
Adjusting Colors and Contrast
Fine-tune the colors, contrast, and brightness of the images to accurately represent the true appearance of the garment. Avoid over-editing, as excessive manipulation can distort the colors and textures, leading to unrealistic visuals.
Optimizing Images for SEO
To maximize visibility and search engine rankings, optimize the images for online platforms and search engines:
File Naming and Alt Text
Assign descriptive file names and alt text to the images, incorporating relevant keywords and product attributes. This not only improves accessibility for visually impaired users but also enhances the SEO value of the images.
Image Compression
Reduce the file size of the images without sacrificing quality to improve website loading speed and user experience. Compression techniques such as JPEG optimization help strike a balance between image quality and performance.
Utilizing 360-Degree Photography
Take product visualization to the next level by incorporating interactive 360-degree photography:
Benefits and Implementation
360-degree photography allows customers to rotate and zoom in on the product, simulating a tactile shopping experience online. Invest in specialized equipment or software solutions to capture and display 360-degree images seamlessly.
Avoiding Common Mistakes
Steer clear of common pitfalls that can compromise the quality and effectiveness of ghost mannequin photography:
Reflections and Shadows
Minimize reflections and shadows by adjusting the lighting setup and positioning of the mannequin. Use diffusers, reflectors, or polarizing filters to control glare and unwanted reflections.
Over-editing
Exercise restraint when editing the images, avoiding excessive retouching or manipulation that distorts the appearance of the garment. Aim for a natural and authentic representation that accurately reflects the product.
Measuring Success
Track key performance indicators and metrics to evaluate the effectiveness of your ghost mannequin photography strategy:
Monitoring Engagement Metrics
Analyze metrics such as click-through rates, bounce rates, and conversion rates to gauge the impact of the images on user engagement and purchasing behavior.
A/B Testing
Conduct A/B tests with different variations of product images to identify which styles, angles, or settings resonate most with your target audience. Use the insights gained to refine your photography approach and optimize conversion rates.
Staying Updated with Trends
Stay abreast of emerging trends and innovations in ghost mannequin photography to maintain a competitive edge:
Innovations in Ghost Mannequin Photography
Explore new techniques, tools, and technologies that streamline the photography process and enhance the visual appeal of the images. Stay proactive in adopting innovative solutions that align with your brand objectives and customer preferences.
Industry Best Practices
Learn from industry experts and thought leaders who specialize in e-commerce photography. Attend workshops, webinars, or conferences to stay informed about the latest best practices and techniques for optimizing product visuals.
Case Studies and Success Stories
Draw inspiration from real-world examples of successful ghost mannequin photography implementations:
Highlight case studies and success stories from leading e-commerce brands that have achieved tangible results through strategic use of ghost mannequin photography. Analyze their approaches, tactics, and outcomes to glean actionable insights for your own business.
Conclusion
Ghost mannequin photography offers e-commerce businesses a powerful tool for showcasing apparel and garments in a captivating and immersive manner. By following these tips and best practices, you can elevate your product visuals, enhance the customer experience, and drive conversion rates. Embrace innovation, stay attuned to industry trends, and continually refine your photography techniques to stay ahead in the competitive e-commerce landscape.
FAQs (Frequently Asked Questions)
What is ghost mannequin photography?
- Ghost mannequin photography is a technique used to showcase apparel and garments in a lifelike manner by blending different shots to create a ghostly effect, making it appear as if the clothing is being worn by an invisible model.
Why is ghost mannequin photography important for e-commerce businesses?
- Ghost mannequin photography enhances product presentation, improves the customer experience, ensures brand consistency, and increases conversion rates by providing high-quality visuals that instill confidence in potential buyers.
How do you choose the right mannequin for ghost mannequin photography?
- Consider factors such as the type of mannequin (full-body, torso, specialized), size, and fit to ensure that the garments appear flattering and accurately represent how they would look on a human body.
What are some common mistakes to avoid in ghost mannequin photography?
- Common mistakes include reflections and shadows, over-editing, and neglecting to optimize images for SEO. Minimize glare and shadows, exercise restraint when editing images, and optimize file names and alt text for search engines.
How can e-commerce businesses measure the success of their ghost mannequin photography efforts?
- Monitor engagement metrics such as click-through rates, bounce rates, and conversion rates, and conduct A/B testing with different variations of product images to identify which styles and settings resonate most with your target audience.