
Basic Tips to Get Started in Night Photography
Night photography is a type of photography that has a lot of charm since it is often a challenge. Controlling the brightness, especially within cities, and looking for different creative possibilities because the objects to be photographed are very different from those of the day are some of the reasons why it is a challenge.
Therefore, today we are going to talk about night photography from different possibilities: such as night photography in the city, photography of the stars, photography with light painting, etc.
Equipment needed for night photography:
Regardless of what you are going to photograph, this is the equipment you will need when going out to photograph at night:
-Full frame camera: If it is also a camera with an APS-C sensor, much better. These cameras have a higher ISO performance and this will make our photos have less grain and higher quality.
-A tripod: The tripod is essential for night photography. We will need to use long exposure times and if we do it without a tripod we will get shaky and unfocused images.
-Luminous lens: As we say, light, or rather, the absence of light, is the key in this type of photography. That is why we are going to need all the extra light we can. It is best to look for bright lenses preferably 14 to 24mm and with an aperture of f / 2.8 or more. The more the better.
-A flashlight with warm or cold light to illuminate: Carrying a flashlight is essential, although the ideal is to carry two. On the one hand, it will help us to illuminate the camera itself and on the other, it will help us to illuminate the object or the person we photograph if necessary.
For example, if we are going to photograph a person under the stars and we want the person to come out illuminated with a flashlight, a few seconds will be enough. Other times there will be an element that we want to highlight, for this we will also need the flashlight.
The point is that in night photography we do not illuminate the entire location, the entire scene, but rather an element that we want to highlight in the dark. If we want it to have an atmosphere like candlelight, we will use a warm light lantern. If our composition requires a more bluish light, we will opt for a cold light flashlight.
-A headlamp: it will help us to illuminate the work area. It is much more comfortable than a flashlight because normally a photographer is always on his team unless you go in a group and share part of the equipment. So, to place the tripod, and organize yourself, you will lack hands with a normal flashlight. Therefore, the most comfortable thing is to also carry a headlamp.
-An intervalometer or cable or remote trigger: An intervalometer is a remote trigger and is necessary for night photography especially for long exposures or self-portraits.
It is also essential to avoid shaking. This is the shaking that occurs when we press to shoot.
The intervalometer allows you to program it to trigger our camera automatically in time intervals. Thus, we will get our camera to shoot a certain number of photos, during a certain time and with a specific time interval between each one of them.
This is great for everything related to movement. It is perfect for observing the movement of the moon throughout the night, for example, to capture the movements of the stars through different photographs, for the movement of cars and other elements, or to achieve other effects that we will see later.
It is also essential to give us time to appear in the photo from the moment we frame and shoot until we position ourselves in the scene. In fact, we can shoot in the distance without having to run with many of them.
-It is also essential to shoot in Bulb mode without having to press the shutter button all the time. Without the shutter button, pressing the button can make your photo shake, and if you choose to keep your finger holding the button throughout the photo, the result can be even worse. This is why most triggers have a “Hold” function.
This function allows you to lock the shutter button so that it stays in operation for as long as you need.
-Additional batteries, especially on cold days. It is always good to carry extra batteries, but at night it is usually colder and in the cold, the batteries are consumed more quickly so it is essential to carry spare batteries. Always carry more than you would during the day.
-A ball head: If our tripod has a ball head, it will allow us to work with more precision, speed and fluidity. The ball head is characterized by having a single control point that blocks or unlocks movement.
– A good photography backpack or small bag to store your camera and accessories. Whenever we leave the studio it is essential to carry our protected equipment, be it only the camera or a large piece of equipment. Safety, protection against blows, inclement weather, and thieves is key so that the adventure can be repeated many more times.
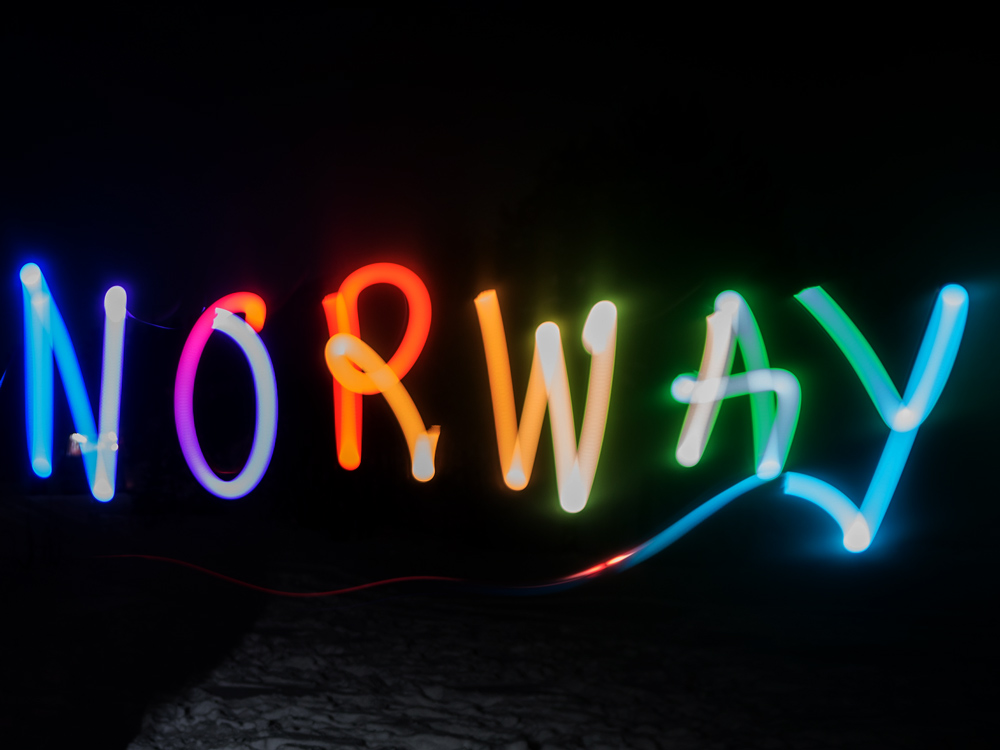
-App to know where the stars, stars, and other useful information are or will be. PhotoPills is one of them. In fact, it is the most famous and complete app. It gives you information about the sun, the moon, the milky way and it also helps you with Timelapse, exposure times, and other interesting information for photographers as you can see on its website.
If you also go, for example, to the Arctic to photograph the Northern Lights, others like NorwayLights tell you if they will be seen that night or not. All the information about the sky both from the point of view of astronomy and the climate is essential before leaving home.
Night photography in the city
Photographing the city is a very attractive option, in fact, there are many “ street photographers ” who dedicate themselves exclusively to this topic. However, at night the city offers other possibilities.
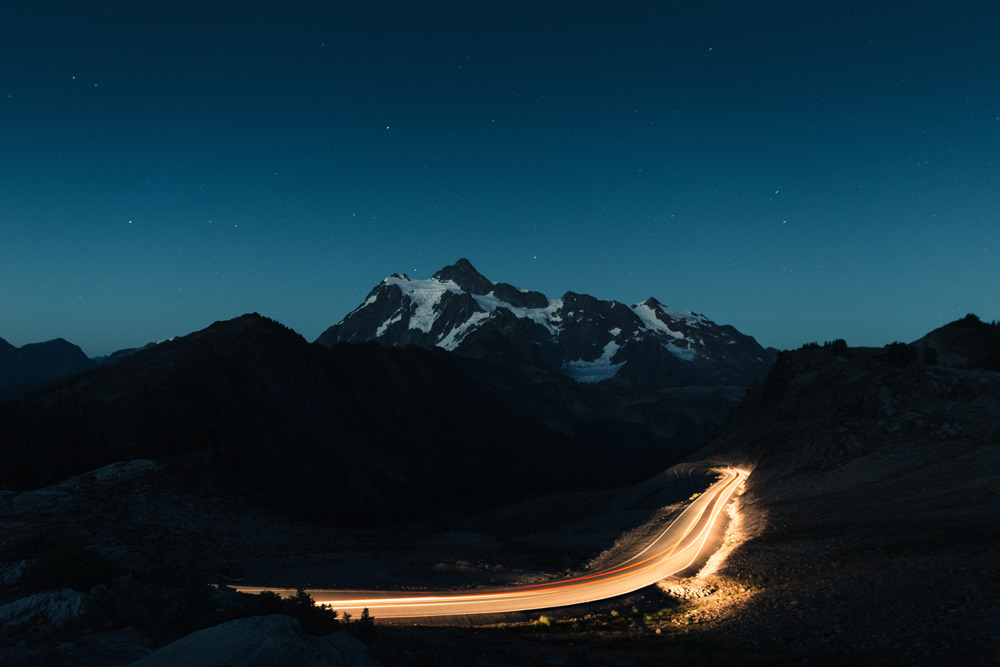
The lack of sunlight and the illumination of lights, traffic lights, and bulbs make our photographs find other points of interest. For example, movement thanks to light.
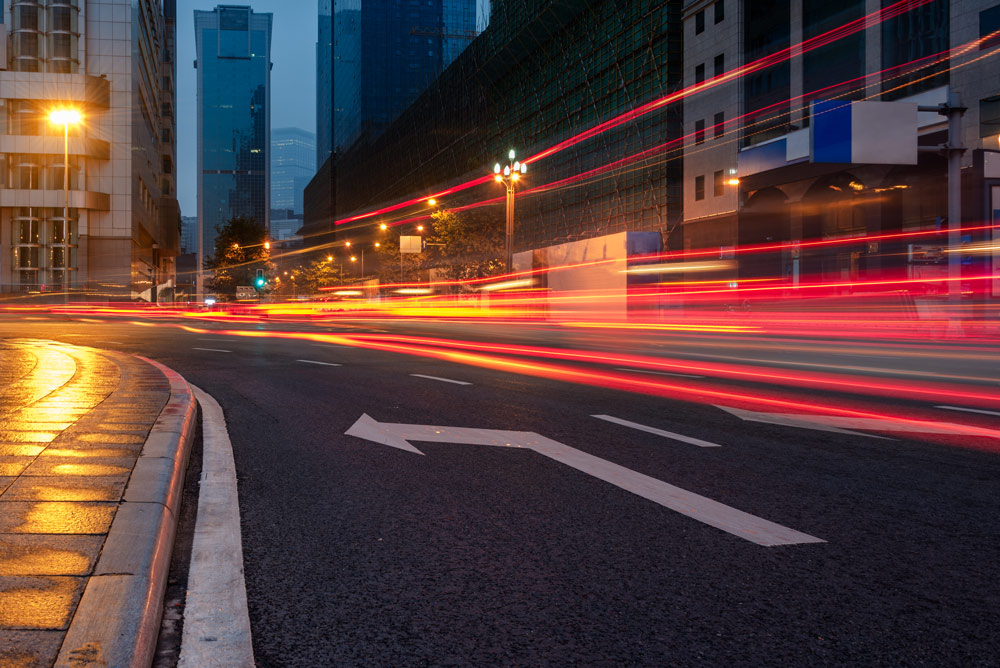
If we want to show the movement thanks to the lights of the cars, what we must do is leave a long exposure .
For the opposite, we will need to raise ISO, lower the shutter speed and increase the diaphragm aperture, taking care that the lights do not burn our photograph.
Night photography lightpainting
Night photography taken with ambient light must be differentiated from light painting photography. The latter uses artificial lighting such as flashlights or colored lights to paint with light. It is a technique that does not require a lot of equipment but it does require practice to achieve the effect you want.
To achieve this type of effects you only need: have a led flashlight that can change color, or lights, flashlights, flashes … A tripod. A camera with Bulb mode, that is, that can expose the scene for more than 30 seconds since you will need to put a long exposure. And a diaphragm aperture at f / 8 as a guide aperture.
Depending on how the image looks due to the location and the framing, you will have to modify it little by little. This technique requires above all that you think about the end result before starting and good planning.
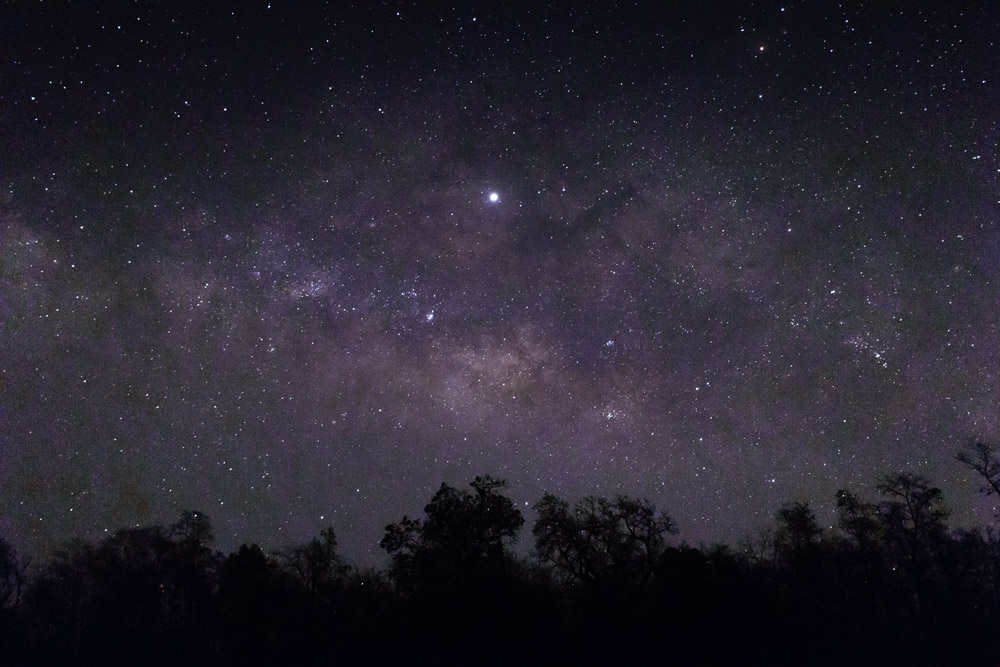
Night photography of the stars
Photographing the stars is not easy as it is difficult for the camera to capture their light. Some important tips to keep in mind are:
-Stay away from light pollution. For photographs of the stars we will put the camera in manual and deform it to try to capture all the light coming from the sky. If we are surrounded by streetlights or light from the city appears in the frame, they can burn that area of the photograph. Even if we are far from the city and there is still light pollution, the skies will appear orange instead of dark, as in the previous photo.
– In the event that the opposite of the previous point is sought, for photographs of the illuminated city landscape, it is recommended to use special filters such as H&Y Pure Night to avoid these lights and their effects.
-Inform yourself about the weather . It is essential that it is clear to be able to photograph the sky. So make sure you have reliable information before you hit the field. If you do not have an app that tells you, look for information through reliable websites such as the State Meteorological Agency or others.
-Watch the moon. If we want to photograph a group of stars, it is best to avoid the moon, since it reflects a lot of light. Much more than you surely expect and of course, much more than the stars emit, so it is better to choose one and the other.
– It is not advisable to go to the field alone . It can be dangerous and surely less fun. Especially avoid going alone to locations that you don’t know very well. You can run into numerous dangers like holes that don’t look good, especially in ruins, and other unpleasant surprises. If something happens to you and you are accompanied, it will be easier to ask for help. In any case, carry your mobile well charged and at hand.
-Warm clothes . The temperature at night is usually quite low, especially in autumn and winter, so bring warm clothes, a hat, appropriate shoes, wool socks and gloves. They are essential to be able to select the controls comfortably.
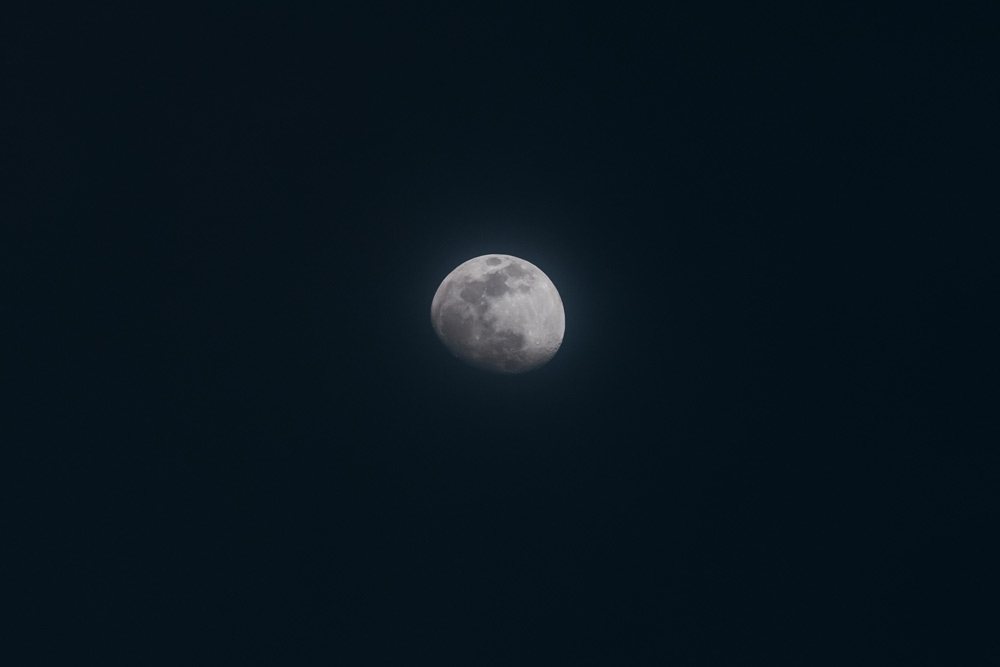
Night Photography: The Moon
To photograph the moon, these are the tips you should follow:
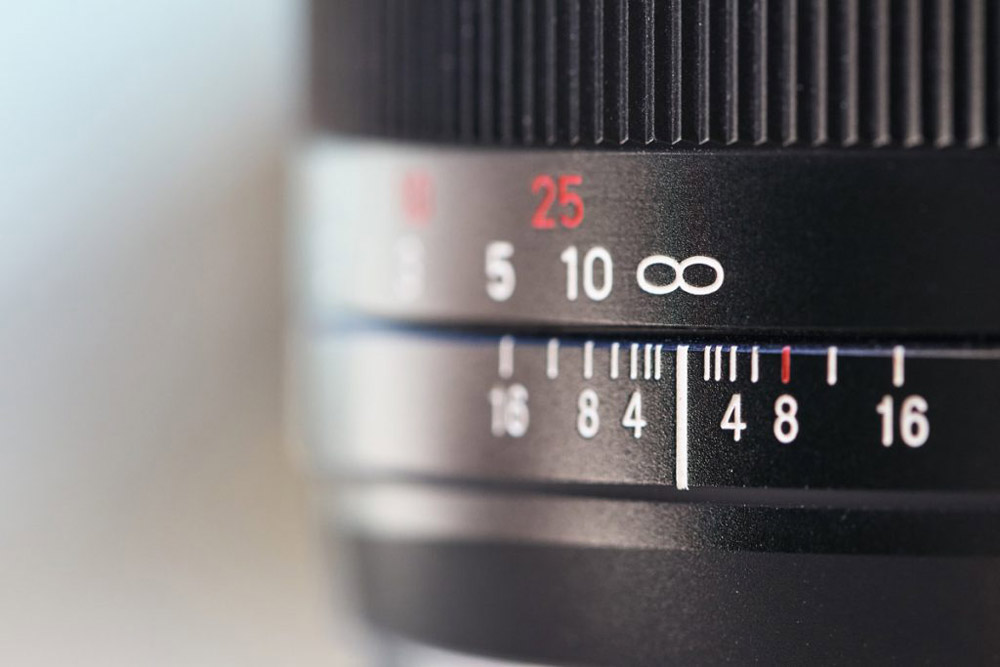
- Objective. In this case you will need a telephoto lens.
- Fundamental as we have said before, the tripod
- Select the spot metering mode.
- Use a medium diaphragm aperture. In order to avoid that by pressing the shutter you end up moving the whole camera, use a remote shutter or set the camera in “delay mode” in 5 or 10 seconds, so that you can get away from it with enough tranquility and without throwing anything
- Set your ISO to the minimum.
- Lock the mirror for stability.
- Use a remote trigger. If you don’t have it, set the camera to “delay mode” for about 5 seconds. This way you make sure that you are not going to move the camera when shooting. It will give you enough time to remove your finger and even walk away from it.
- The camera screens being small can give us the impression that our photography is sharp. Don’t forget to zoom the photo all the way to make sure it’s sharp and in focus.
- Finally, two important aspects. Before leaving, find out what phase the moon is in. It is not only important to know if there will be clouds or not, many or few, but in what phase it is to decide which days we go out.
- And before shooting, look for an interesting composition. With a cloud, skyscrapers, trees, a mountain … The first times you will be excited to have managed to photograph it, but then you may see that the moon by itself loses its appeal
Night star photography settings
– ISO: the higher you raise the ISO, the more stars you will capture, but also more noise and more light pollution. Our recommendation is that you do not be surprised if you need to set the ISO between: 1500-3200 whenever we are at night and raise it as necessary.
Depending on the camera and location, you may be able to get photos with much less. In any case, in night photography you will always have to do several tests before achieving the final one.
Some cameras to avoid this, have the option of noise reduction. This can be interesting, but remember not to leave this option in the tests and you will not be able to use it for time lapse or startrails either.
– LENS: use bright and wide- angle lenses . A wide angle is not a must, but it is a good bet.
– DIAPHRAGM: When photographing the stars at night, the more we open the diaphragm, the more stars we will be able to capture. Depending on the type of light sources you have, you may have to close it a little so that the image does not burn. f / 2.8 can be a good start
– BUBBLE LEVEL: Don’t forget to calibrate the bubble level for night landscapes.
-FOCUS: Focusing at night and on elements such as stars is something that will cost us a lot by eye. Autofocus will not work and therefore an autofocus lens is not necessary for this discipline . You have to do manual focus . We can approach in two ways:
- Focus to infinity. Many lenses in the focus ring are indicated by an infinity symbol on the focus ring. If we leave it marked, the stars will come out in focus.
Know or learn to use the hyperfocal lens . If your lens does not have the previous option, you will have to resort to hyperfocal. Hyperfocal distance is the minimum focusing distance with which a greater depth of field is achieved.
Making this calculation is not an easy thing since it depends on other factors such as ISO, aperture and even the type of camera. This focus goes from the middle to the middle of this distance, to infinity.
Due to its difficulty, we recommend that you use an app that we propose below, depending on the camera you have and your mobile phone: For Android you can calculate it with HyperFocal Pro , HyperFocal Distance Calculator and DOF Calculator , and for iPhone with SetMyCamera – DoF Calculator , HyperFocal and Hyperfocal Calc among others.
– SHUTTER SPEED: In night photography, the time in which we have the shutter open is very long. We speak of seconds and in some cases even minutes. A tripod is therefore essential in these photographs that require long exposures.
How long should we leave? As we say, it depends on several factors and you will have to try first, but the usual thing if you want the stars to appear as dots, a variable time between less than 15-25 seconds is estimated .
If you also want the trees you see in the photo to appear illuminated, just do it with the flashlight for a few moments.
When done with a tripod, you will have exactly the same image. So you can also join two photos in post-production: in one you focus on the sky and in another one on the trees, the mountain or the nearby elements that you want to illuminate and then combine them in Photoshop.
What happens if you leave the exposure for a longer time, so as not to modify other parameters? What happens is that although it may not seem like it a priori, the stars also move and will appear as shooting stars with a tail or directly as lines in the sky. This type of photography is also very attractive and its result is circumpolar photographs.
Night Photography of Stars: Circumpolar Photographs and Startrails
These types of photographs are called circumpolar because, as you can see in our example, all the stars revolve in a circle around a specific star: it is the pole star. Finding it before you start will help you compose the photo in a more interesting way.
To achieve this effect you will need an exposure of more than 25-30 seconds.
This is called startrails and it consists of taking several photographs of the sky in a row and then merging them all.
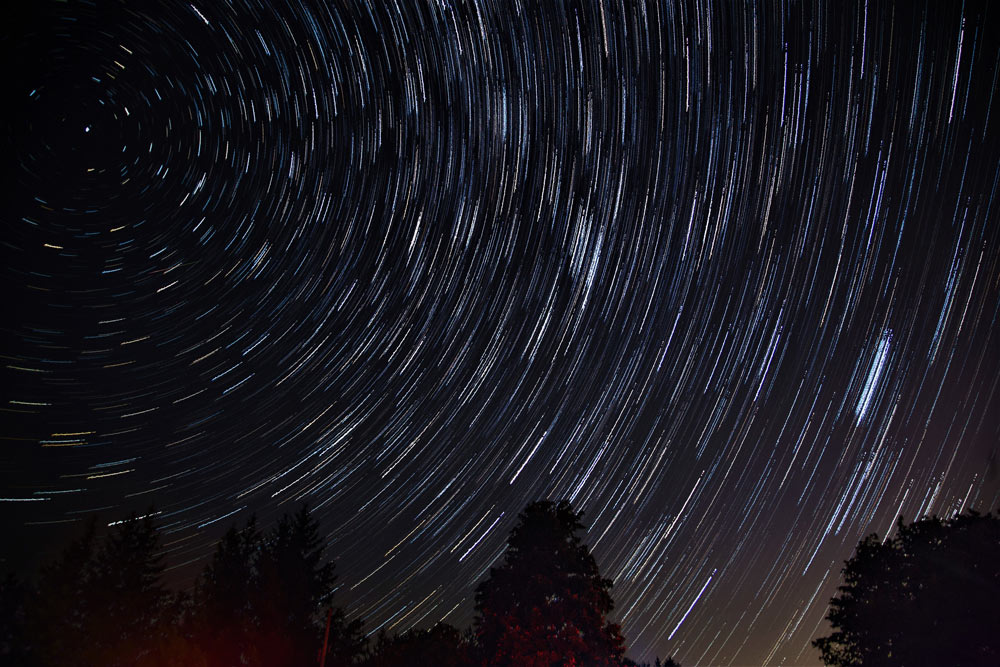
To get these pictures correctly, an intervalometer is very necessary . Otherwise, our photo will have more noise, light pollution and perhaps even hot pixels or colored dots (which are not stars, but a product of the overheating of our camera’s sensor). To avoid all this, as we say, you will need an intervalometer.
The intervalometer can be internal or external to your camera and it is best to take as many pictures as you can with a short interval, of a second if you can. If too many seconds pass between one and the other, they will appear as dashed lines instead of dashes.
The next thing is to have a lot of patience and be warm because you may need an hour or more to take these types of photographs.
There are programs like Startrails (Also available in Spanish) to join all the photos. This is a free program and very easy to use. You just have to upload all the photos and it will organize them all automatically. It also allows you to remove some if they don’t fit the final composition.
Finally, you can give some touch-ups to your photos with editing in Photoshop or Lightroom by superimposing several layers, but also using filters to enhance the photo such as noise reduction filters, brightness and contrast adjustments or those of noise adjustments. color to make the sky even more spectacular.
Do you have any doubt? Any advice you want to share? Write us in the comments and start practicing.