
10 Tricks to Know How to Take Professional Photos with Your Cell Phone – Image Work India
Many times we believe that to take excellent photos we need super professional cameras, to be experienced photographers and to be in very well equipped locations. These factors help to some extent, but they don’t assure you one hundred percent that this will be the case. We also think that we need to have extensive knowledge in design courses or be a recognized photographer, with professional cameras with many lenses or be highly equipped.
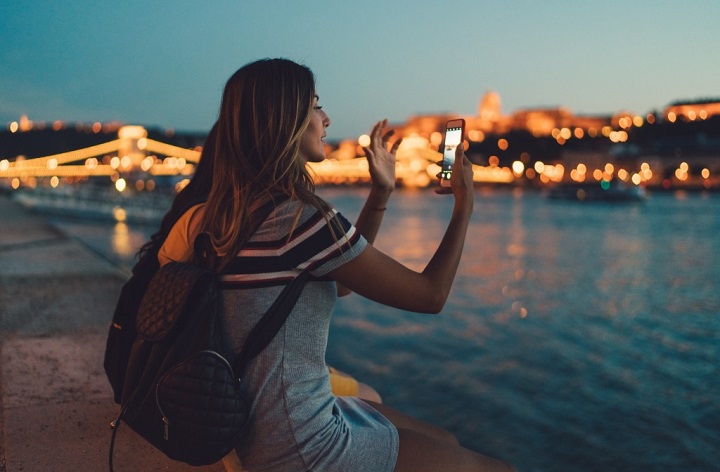
The truth is that with the era of technology, today many people prefer to take photos during their trips, only with a cell phone or smartphone, because in addition to replacing a compact camera, they have lighter weight and the photos are more than sharing them. While with conventional cameras you would have to download the images to just share them and the weight and size, not to mention.
What is highly relevant is the ability to take advantage of the devices that we have at our fingertips and thus be able to take our best photos. So today we want to share 10 super simple tricks to know how to take professional photos with your cell phone so you can get the most beautiful photos. Remember that for a digital marketing expert or a community manager, being able to take a photo and publish it immediately is part of life. Let’s get started.
1. Get the correct and necessary exposure
When you want to know how to take professional photos with your cell phone, you must bear in mind that light is the fundamental element of a photograph. It’s important to use the right amount, especially if you’re taking photos with a cell phone. To do this, you must know how to control this measurement according to the exposure value, which is the time the diaphragm is open in front of the light. Knowing about the exposure allows you to take quality photos, avoiding overexposure (excess light) or underexposure (low light). This is possible taking into account two concepts: the exposure time and the aperture of the diaphragm.
In cell phones, the diaphragm is fixed, to facilitate taking photos. In general, these usually have an automatic aperture of between f / 2.0 and f / 2.4 which is a standard measure for a correct light input. Still, it’s important to know that the wider the aperture is, the more light it lets into the camera’s sensor. In manual mode, depending on the model of your smartphone, you can modify these values between wider ranges, taking into account that the longer the exposure, the more light will enter the sensor, and the shorter, the less light will enter.
In cell phones there are three ways to control exposure:
First Mode:
You just need to click the shutter button and it will automatically calculate the appropriate light for your shots.
Second Mode:
Adjust the light by touching the area of the screen where the object you want to capture is located and the camera will automatically adjust the exposure to balance it. Ideal for times where the subject is too dark or too bright.
Third mode:
Make use of the manual exposure adjustment that, in most cell phones, is shown as an option on the side of the screen, with a +/-, sun or bulb icon that can slide to change to different light ranges.
2. Be aware of the little things, but not too close
In most smartphones, you can focus on the subject using the zoom option of the camera. However, all lenses have a minimum focus distance, so if you zoom too much you can distort the quality of your photos. Therefore, it is advisable not to abuse this resource.
If you are very close and your subject is still blurry, back up until it becomes sharp. It won’t take long, maybe an inch or so. That way you will have a sharper image without altering the quality and sharpness of the shot. On the contrary, if you are looking for a focus on certain objects, the idea is to get as close as possible to the objective. You can also let the shot have some extra space so that later you can crop it a bit to focus on your subjects.
3. Use the grid or grid
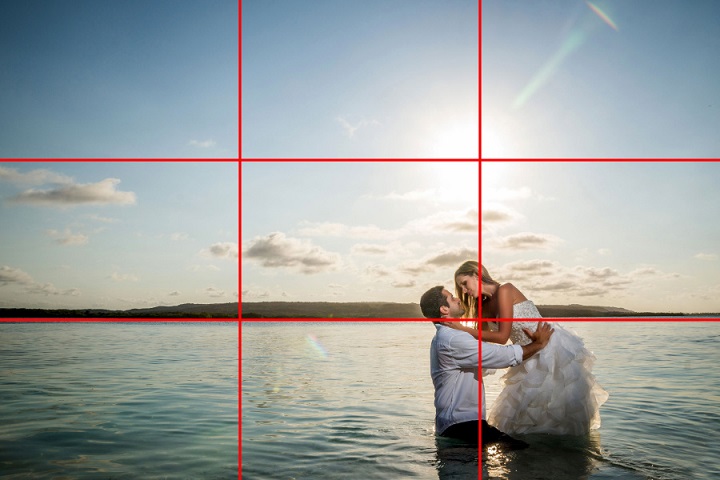
In most smartphone cameras, there is a built-in grid that shows the screen divided into three sections, which comes from the most well-known rule in photography: the rule of thirds. Activating this option allows you to have a built-in grid that shows lines on the screen and divides them into three horizontal sections and three vertical sections, resulting in 9 equal squares.
According to this photography rule, if you place the central objective of the photo (be it a person, animal, or thing) along with one of these lines or at one of their four intersections, you will achieve a stronger photographic composition. This helps us to order and highlight the elements within the shot since we will be able to direct the points of attention.
You can also apply the horizon law which consists of taking the photo prioritizing three equal parts, divided by the horizontal lines. If, for example, you want to highlight the sky, you have to make it occupy two of the parts, leaving one part for the terrestrial landscape. If you want the earth to dominate, place the sky higher so that the earth occupies the remaining two parts of the composition.
The main trick is to play to your liking with the approaches of the smartphone, giving different points of view to your photos, to highlight or not certain elements that make them unique.
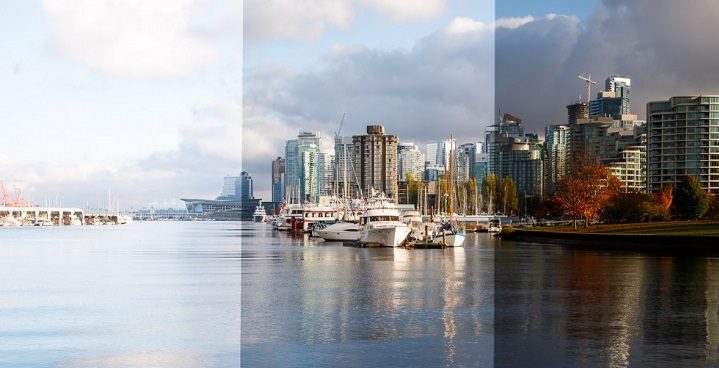
4. Use natural light

The flash of cell phones is harsh, therefore it is unflattering. Since this is right next to the lens, which makes the light face straight ahead and does not help you give your photographs dimensionality. This natural error causes the light to be projected in front of the object, taking away all the depth. It is important to know that the flash of cell phones shoots a very harsh light that does not favor most of the photos.
The cheapest and fastest way to get beautiful images is to use window light. But avoid that it has contact with sunlight, which affects your shots. You can take the direction of the light as a reference to obtain various effects: front light (highlights details), side (highlights textures), zenith (from above, gives perspective), or rear (highlights silhouettes and creates aura effects).
Depending on your goals, you can take advantage of the light in the morning, afternoon, or night. Dusk and dawn offer more orange, pink, or gold lights, so you can play with those tones to give your photos more warmth. For example, depending on the time of day, you can use the light from a window. This will allow reflections from outside to be used, which is perfect for framing a portrait, highlighting points of light on the face, or achieving a mirror-like reflection.
Natural lighting is used in all professional photography courses, so not something that can only be of interest to smartphone users who want to take professional photography.
5. Get on the same level as what you are going to capture

This is a key trick to knowing how to take professional photos with your cell phone. Most of us are used to taking out the phone, taking a photo, and walking, without considering that for these types of photographs, it is recommended that the person who captures the photo is always at the level of the objectives to be photographed. That way you will have a more favorable angle that allows you to frame and highlight the details of the photograph. Also, it is advisable to take several shots in order to choose between the best ones.
But when you have to photograph children or pets, that does not happen, since you have to take the time necessary to capture the perfect image and often repeat it more than once. It is advisable for this type of photograph to be calm and repeat it enough to achieve the ideal photograph. It should be considered that it is not easy to be in control of the situation, as it would happen with young people and adults.
6. Blocks lens flare

Although it is ideal to take advantage of natural light, many times the glare of the sun, or also the lights of a focus, provide a great reflection or flare in the lens that cuts the photo or hides certain details. Eliminating the flare is very simple, as in a sunset where a great flare is generated in the lens. How to remove it and make sure this does not affect the shot? Block the light with your hand, place it to the side of the lens, but always be careful not to put your fingers in the shot.
However, if those are not blocked, you could take advantage of these flashes to give a special light detail to your photos. That depends on you, but you must bear in mind that in the morning there are usually greater flashes of sunlight, but it is at noon when these flashes are stronger, unlike at night where the flashes are given by artificial light.
If you wonder how to take professional photos with your cell phone, this trick is the surest way to avoid glare or flare that can ruin your shots.
7. Put your selfie technique to better use

Don’t just rely on the front lens to make a new profile image; This camera is also very useful for shooting in a variety of hard-to-reach places. Remember that when taking selfies you can play with infinite angles that are not only limited to the extension of your arm. It is undoubtedly the most practical option and you can take very funny photos, and if you dare to change the angles and move your arm a little you will achieve different perspective shots.
In the same way, you can take advantage of the rear camera, to improve the quality of your selfies or give it new frames that go out of the focus of the photos that we usually see on social networks. Do not forget that in both cases you can use the selfie sticks to have a greater range in your photos by expanding the shooting space.
8. Capture images through windows

This will allow you to use reflections from the outside, a perfect resource for framing a portrait or providing a mirror-like reflection, to give you a distorted view of the world. Just make sure the surfaces are as clean and sharp as possible and try to bring your camera closer to the window glass to avoid reflections that distort your shots.
Other great options, which you can take advantage of to take photos with your smartphone, are trips by car, train, bus, or plane so that, in an ingenious way, you can capture everything that is on the other side of the window. If you use beveled windows, even better because their opaque texture helps you create unique effects on your photos. You just have to try to keep the camera at an intermediate distance from the window so that it is clear what you are taking.
9. Burst shooting for moving photos
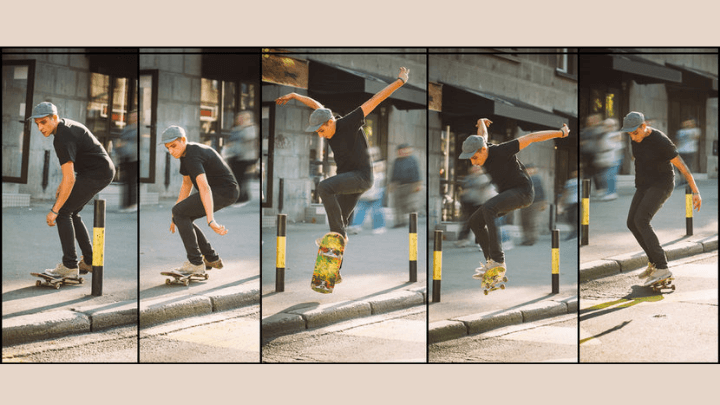
Moving photos can be a big challenge if you try to know how to take professional photos with your cell phone. To achieve perfect photos, Smartphone cameras have an autofocus option that helps freeze moving objects and people. It is quite effective in most shots, however, sometimes these photos are just as blurry and distorted.
Therefore, for these types of photos, it is best to use the burst shooting of your camera or press the shutter continuously so that the multiple shot is activated automatically. With this option, you can take several photos in a single second while you follow the person or object, and then you can choose which is the best photo of all.
An extra trick is to take the burst of photos while you sweep with your cell phone’s camera. That is, take several captures to follow the trajectory of the object or person in action. This is very useful in cases where the person or object in motion passes in front of us.
10. Look for the void or open planes

With wide-angle lenses, it’s easy to capture everything in the scene, which is precisely why you should look for areas with large negative space – that is, simple backgrounds that fill the frame. For example: by making a large expanse of blue sky the priority, you are making the subject more apparent when framed at the bottom of the image.
You can also take advantage of the fact that most Smartphone cell phones have a panoramic shot option that allows you to capture large areas of the landscape. You just have to activate this tool and follow its instructions. In general, you should focus on the initial part of your lens, press the shutter and direct your camera according to the direction and reference points indicated by the cell phone. In this way, you will be able to cover more areas that result in a more complete and majestic photo.
The most important thing before you start: Take care and keep your lens clean
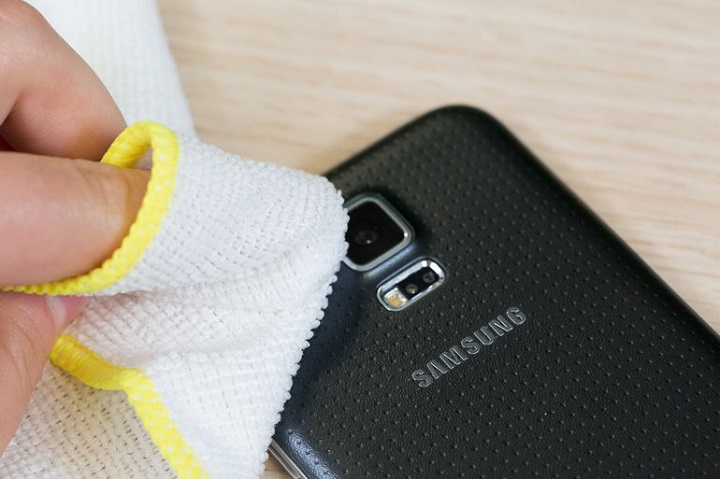
Smartphone manufacturers design their products to be scratch-resistant and fairly durable throughout their lifespan, and this is especially true of the camera lens. But, that does not imply that we should not take care of them, because it is still a delicate piece subject to a lot of exposure either by bumps, scratches, or dirt, which could ruin the whole session that you will regret not having followed these recommendations.
It may seem that this is not relevant when it comes to knowing how to take professional photos with your cell phone. But, if you notice that there is a blur in your photos, you may need to maintain your camera lens. You will need to clean them from time to time, but avoid using your fingers or blowing on the lens as you could make it even dirtier. It is preferable to use a special wipe or a microfiber cloth that will do a better job of cleaning the dirt from the lens. It is also advisable to use special liquids to clean lenses or glasses, you can use a swab to gently clean the lenses of your Smartphone camera.
Finally, we hope that these 10 tricks to know how to take professional photos with your cell phone will help you improve your profiles on social networks. Just exploit your creativity and allow yourself to try some of these tricks so that you can become an experienced photographer. And if you are interested, you can take some photography courses that enhance your skills.